75 push-ups. Every day.
That’s my favorite way to make sure my arms are summah-time ready. This is – in my opinion – the best exercise to do in order to tone your upper arms and back.
I’m telling you – anyone can do this. Here’s how:
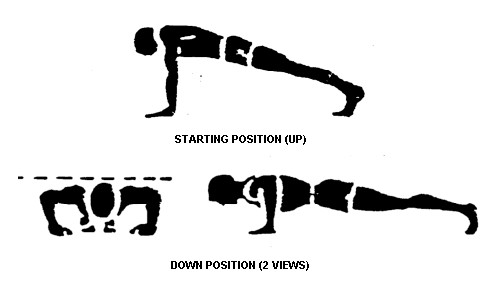
1. Proper Form
- In the low position, your upper and forearms should be at a 90 degree angle and your hands should be under your shoulders. Start out laying on the ground to be sure you’re correctly lined up.
- Keep your core tight – don’t sag you butt OR stick it in the air. You want a straight line from head to ankles (much like the bikini-belly planks earlier this week!).
- Don’t let your chest touch the floor – it should be 2-3 inches from the floor in the lowest position.
- Breathe! In going down, out pushing up.
2. Find Your Starting Point
In order to determine how many sets to do each day, you need to learn what your max is.
Using the aforementioned proper form, get on the floor and to as many push-ups as you can. Go on, do it! Pretend the person in the cub isn’t starting…
Whatever number you reached is your max. Write it down!
3. Divide and Conquer
Divide your max number in half. The result is the number of push-ups you’ll be doing 3x each day with 30-60 seconds of rest in between.
For example:
- Say you did 20 push-ups in your max set (which is where I began)
- Half of 20 is 10
- This means you need to do 3 sets of 10 push-ups each day
Rest for 30-60 secs between sets. You’ll probably need 60 seconds when you begin; as you get stronger, cut down on the rest time a bit.
4. Keep Pushing
Don’t stop here! Re-test yourself once you are able to complete your sets more easily. This might be take 1 week, or it might take 3 weeks. Move at your own pace, but don’t sacrifice form.
If you have trouble with your wrists, try making a fist and doing push-ups on your knuckles so that your wrists aren’t bent. If you have free weights, you can also use those to keep your wrists straight.
Push-ups are awesome because they engage multiple muscle groups – from your core to your calves.
Added bonus: you can do them anywhere! I do them in hotel rooms when traveling to get my blood pumping in the morning.

Results, yo.
When I started, I maxed out at 20 push-ups in a row. I’m up to 50 in a row and do 3 sets of 25 for a total for 75 each day.
Speaking of… it’s about time to re-test…
Steph @ Bite by Bite opens her bake sale today to benefit Team in Training and the Leukemia and Lymphoma Society.
Please click here to check out the bake sale!!! As I said perviously, my dad passed away from Chronic Lymphocytic Leukemia. The proceeds will go to an organization that can really put it to good use. Much more research is needed!
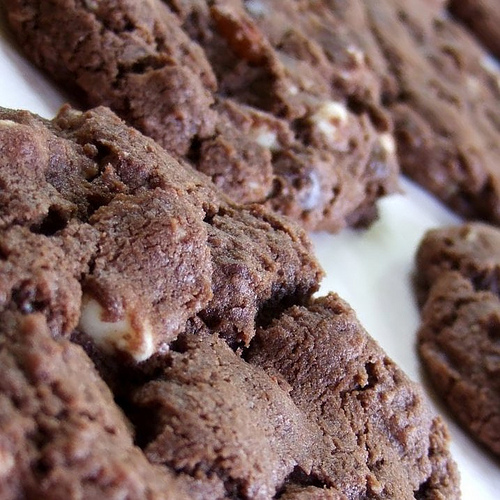
My contribution is a cookie that my dad enjoyed: Dark Chocolate Sea Salt.
Recipe to come (not today as promised… I got distracted planning a baby shower)!!! The basics include: dark chocolate, butter, brown sugar, eggs, vanilla, flour, baking powder, almonds, and crunchy fleur de sel glittered across the top.
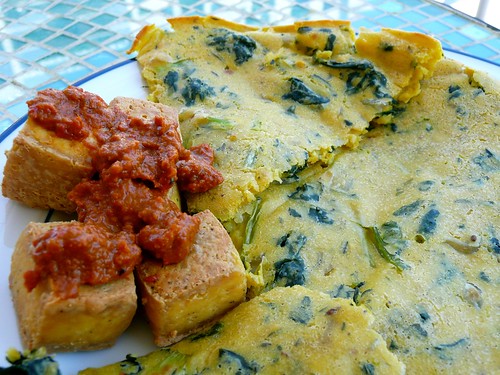
Last night I was inspired by Sarena @ The Non-Dairy Queen. She had Socca Pizza for Mother’s Day!
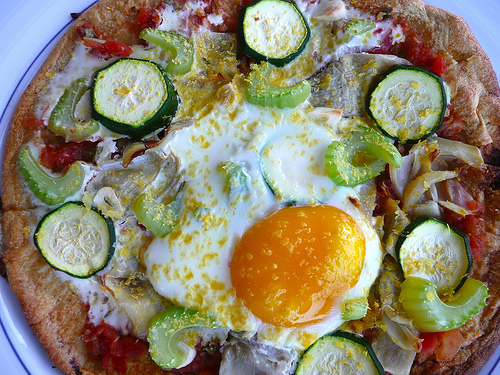
I’ve been craving pizza lately and I’m ALWAYS craving Mexican, so I made a Mexican-inspired socca pizza.
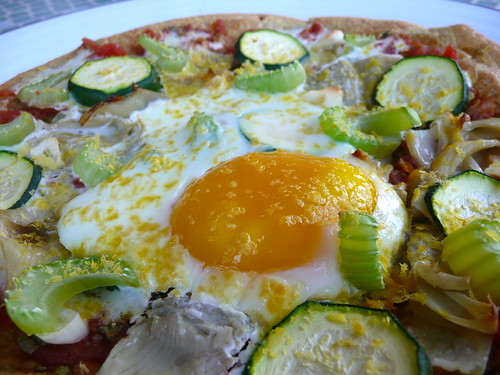
This came out perfectly. It was just the right amount!
I’ll definitely try it with cheese rather than nooch next time (I was OUT!) BUT I really liked it with the nooch. Between the flavorful salsa and the eggy-ness, I didn’t miss it.
After eating pizza topped with a runny egg, I don’t know if I’ll ever eat “regular” pizza again. So. Good.
Mexican Socca Pizza
- 1/2 C chickpea flour
- 1 tsp Essence of Emeril
- 1/2 C water
Toppings:
- Salsa
- Minced garlic
- Celery
- Artichokes
- Zucchini
- Nutritional Yeast
- Egg
Preheat oven to 450 degrees. Grease 9-in round (cake) pan. (I used olive oil spray.)
In a small bowl, whisk together the flour and spices. Gradually whisk in water. Pour into pan and bake for 8-10 mins. Meanwhile, prep any veggies you will be adding to the pizza.
When socca is done, cross your fingers that you greased the pan enough and flip it out onto a baking sheet or pizza stone. Add your sauce and toppings – EXCEPT the nooch and egg. Place in oven for 6-7 mins, until veggies are nearly at desired level of tenderness.
Remove from oven to add the egg and the nooch. Bake for 4-5 more mins, until the egg is just beginning to set. Be sure not to over-cook the yolk.
Remove from oven and let cool briefly before plating and devouring!
***
Thanks for all the input on my rug yesterday. 🙂
What’s the weirdest thing you eat on your pizza?
Ever try it with an egg?
